Only Available To Annual Members
Join Now
Are you having trouble? Feel free to contact us and we will be happy to help you out.
This summer, we're creating a garden together.
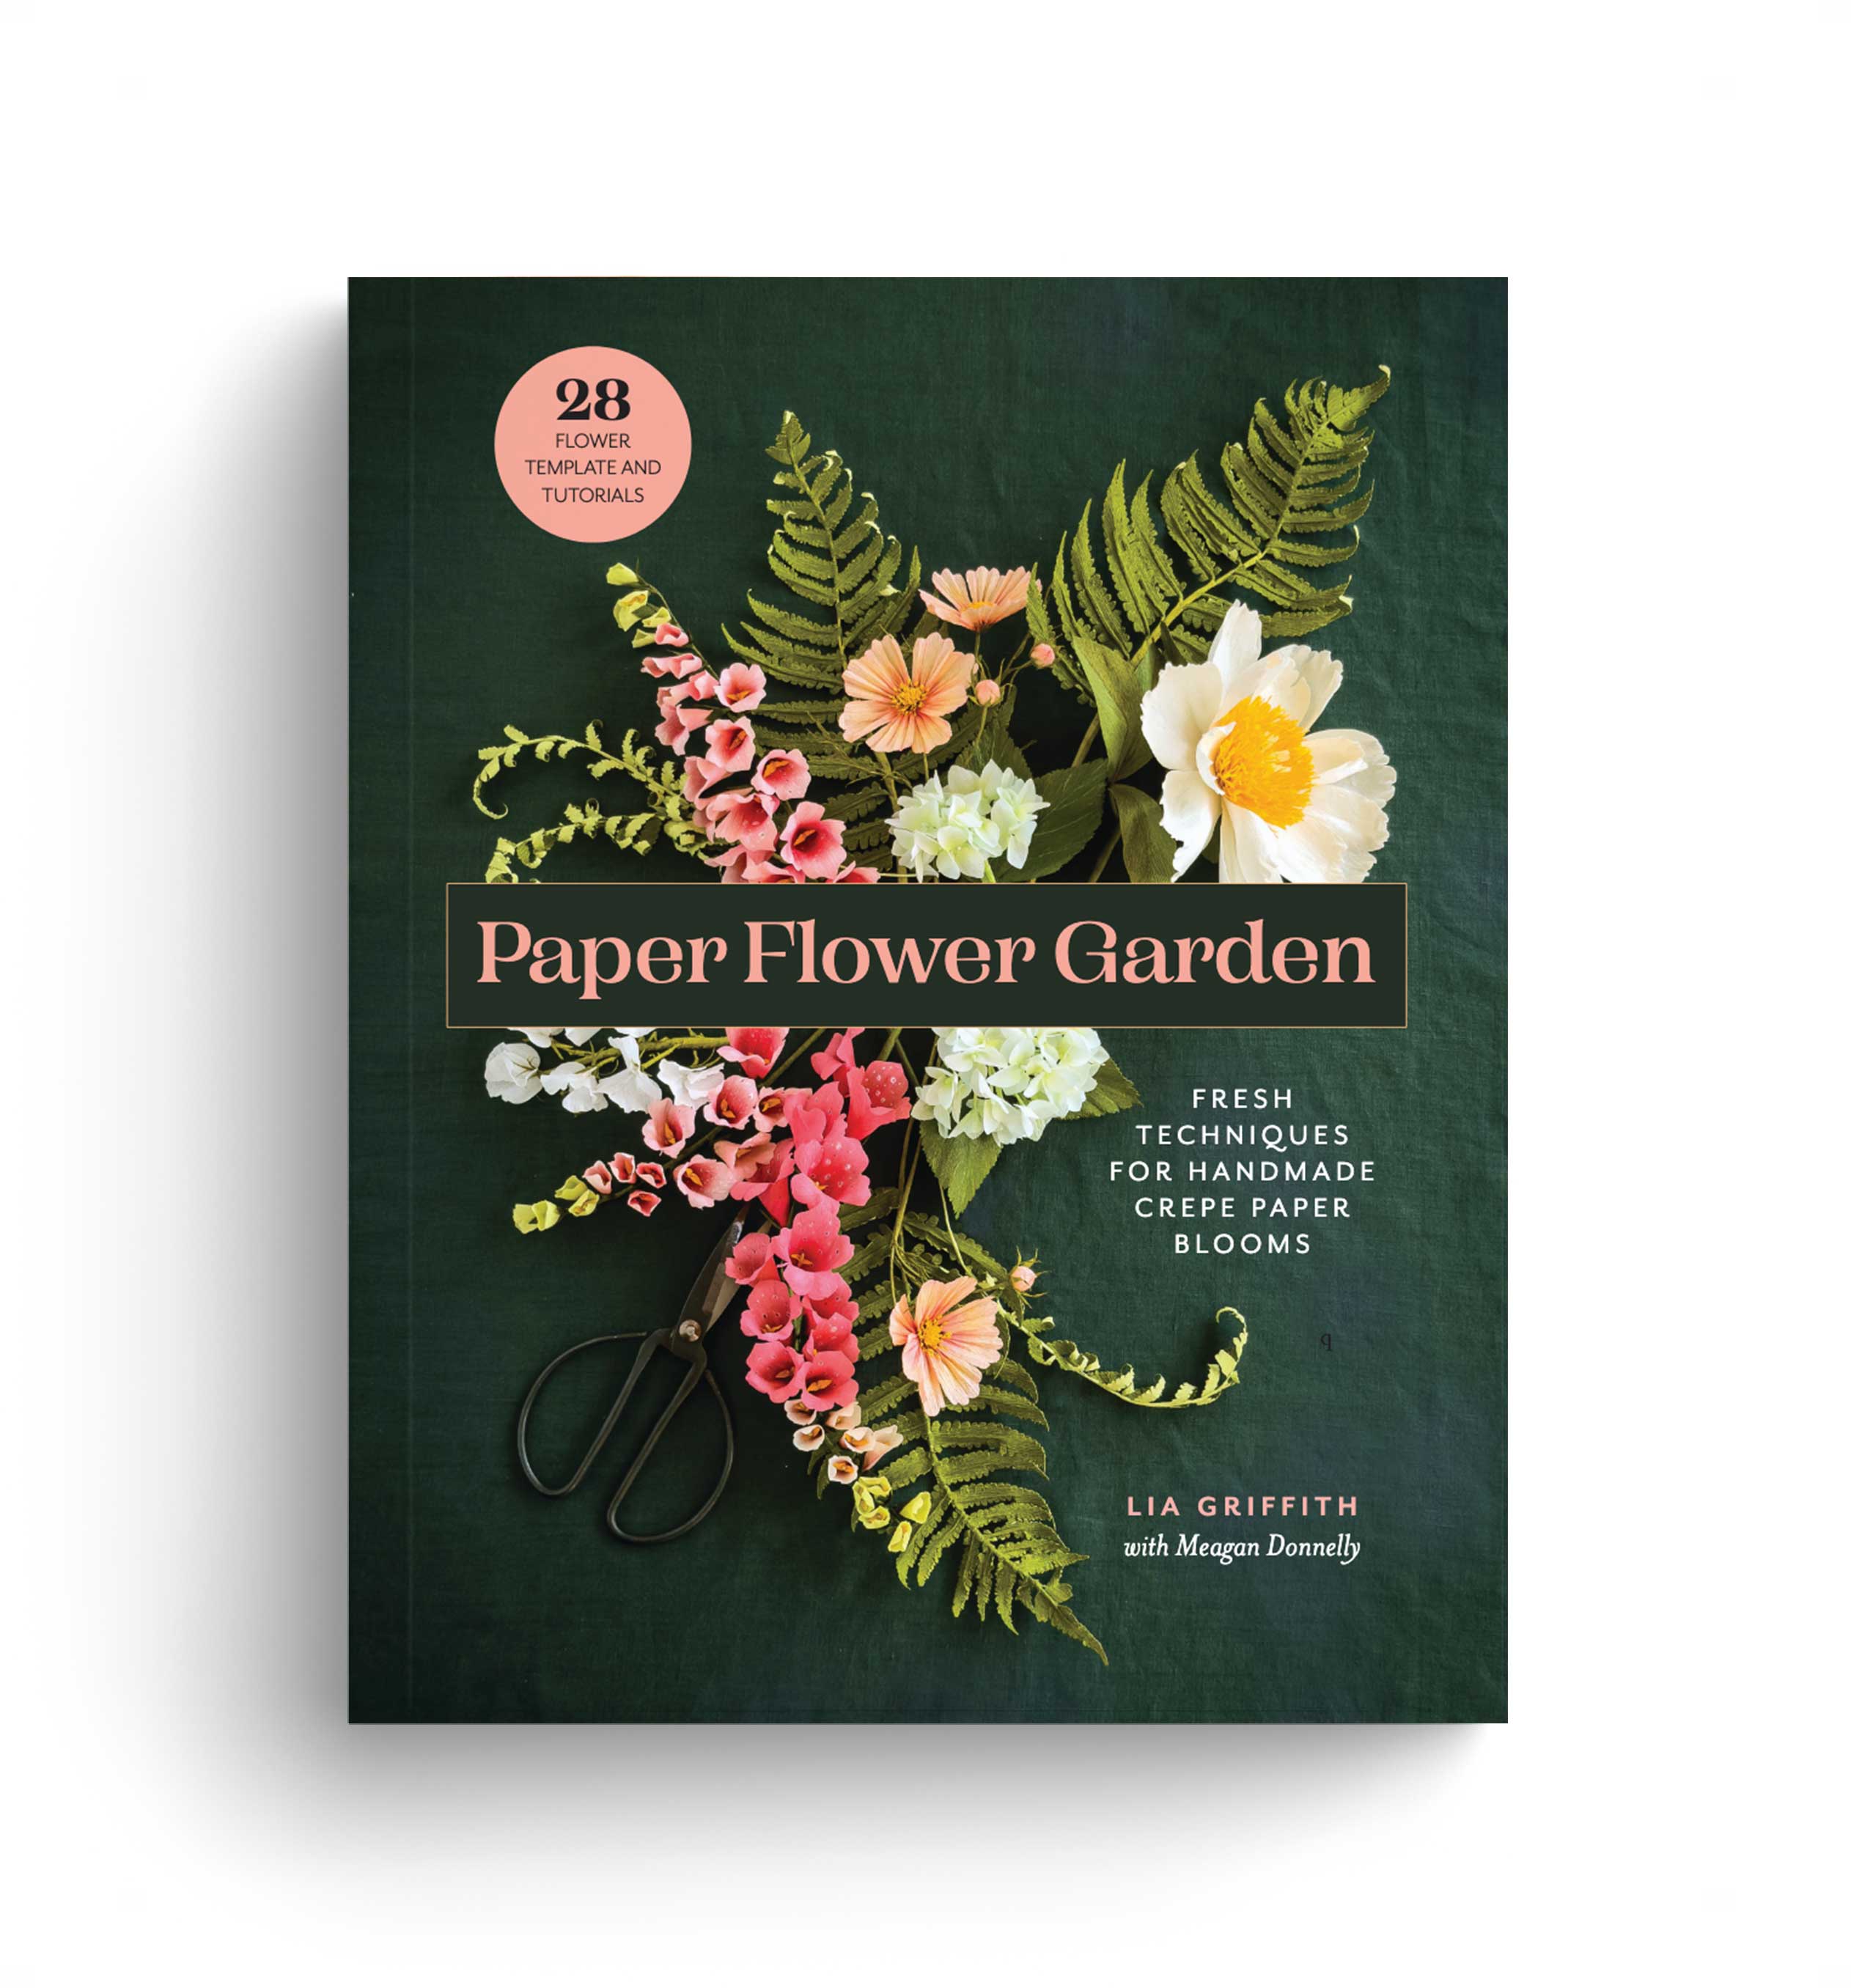
Starting Friday, June 5 at noon PT, join me for the Paper Flower Garden Master Class—a three-month crepe paper flower-making series designed to help you build confidence, technique, and artistry one flower at a time.
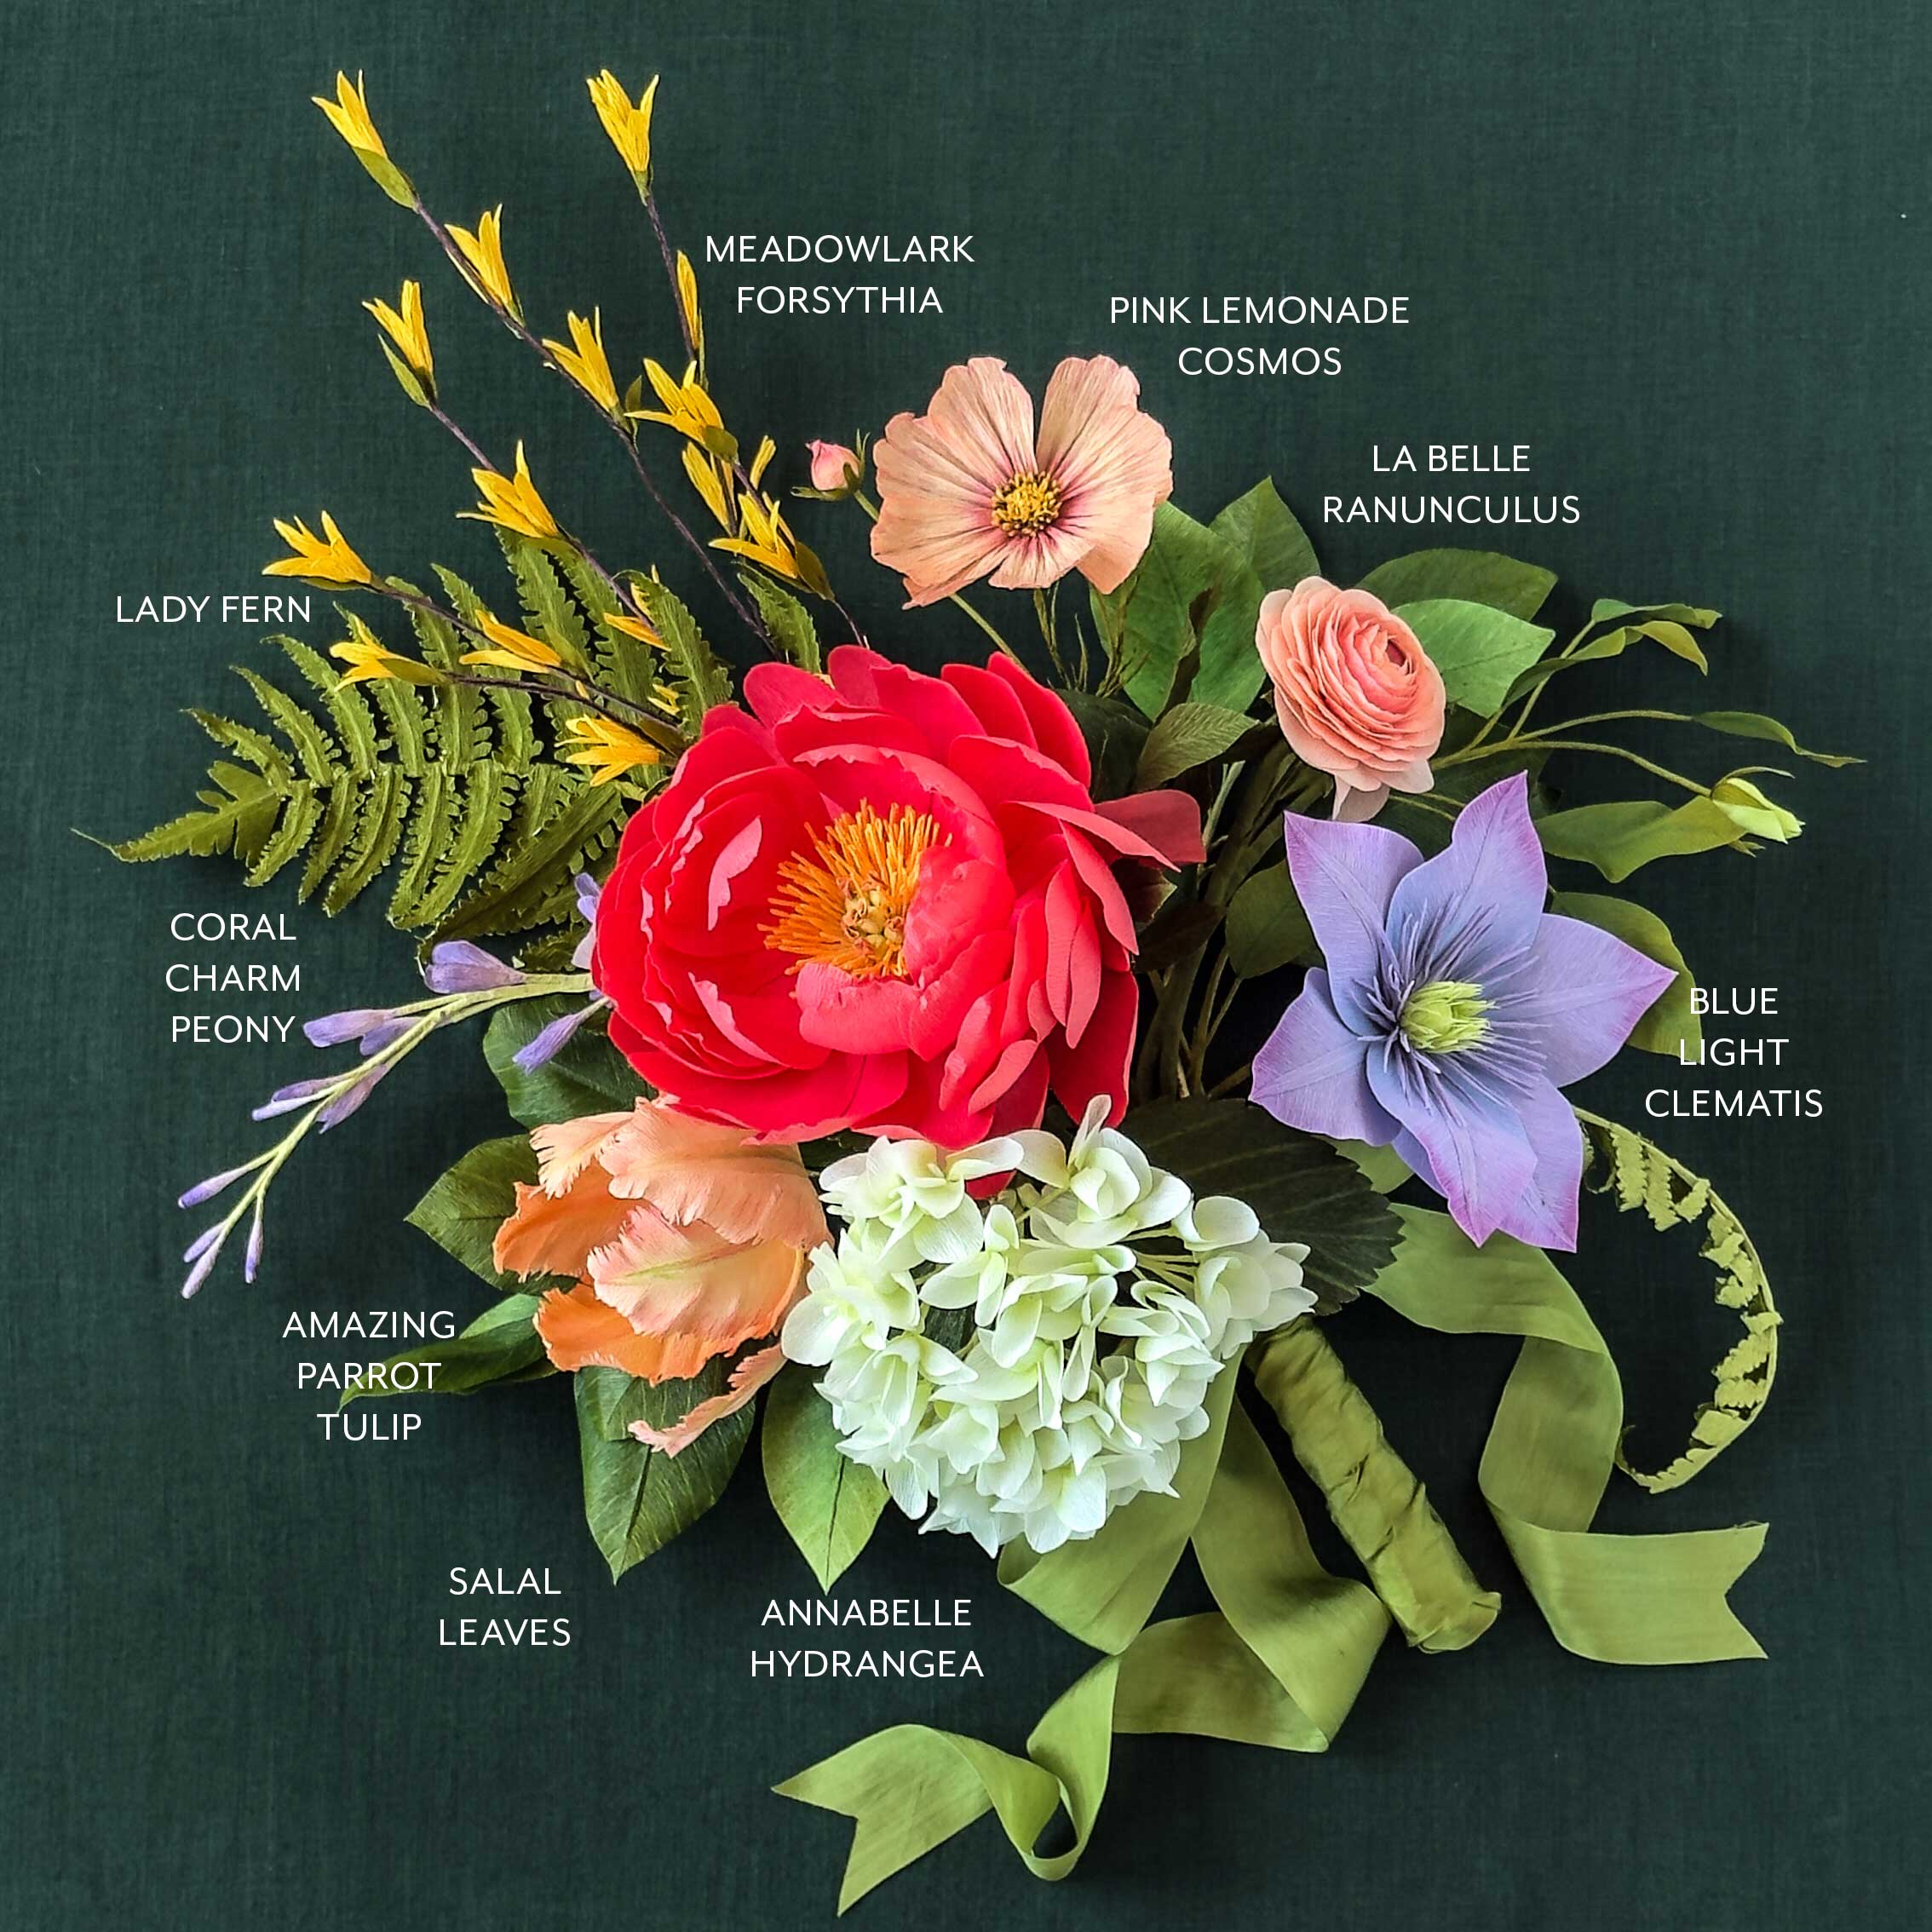
Together, we'll create ten flowers inspired by our new book, Paper Flower Garden. Each bloom builds on the skills from the Crepe Paper Flower Foundation Series, guiding you step by step until we bring everything together into one beautiful finished arrangement.
You will need to complete the Crepe Paper Flower Foundation Series before you can take this Master Class.
New workshops go live Fridays at noon PT (see the schedule to the right), with full replays included so you can craft along live or create at your own pace whenever it works for you. A curated materials bundle will also be available in our Felt Paper Scissors shop, so you can gather everything you need in one place before we begin.
You don't need our book to join, but this master class is built around the studio techniques Meagan Donnelly and I have refined over the past ten years and shared throughout our new book, Paper Flower Garden.
More than anything, this is a creative community experience. We'll be making, learning, and growing together all summer long. And by the end of August, you'll not only have a full bouquet of handmade flowers—you'll have the skills and confidence to continue creating long after the class ends.
The master class experience, including full tutorials, templates, and replays, is exclusively for Annual and Craft Circle members. And because we’re celebrating 13 years of crafting together, Monthly members can watch live on Fridays all summer long as part of our anniversary celebration.
Community Discussion
206 Comments
Sometime in the future, can you demonstrate how to use 3 of each flower to make a wreath?
That is a lovely idea, Carolyn. I LOVE wreathes for home decor. 🙂
What a great series this has been so far!
I just tried cutting the tulips project on my Cricut, and the largest leaf is sized to be 11″long.
Should I resize the whole upload? I know the cut-by-hand template leaf is closer to 10″. Any guidance would be appreciated.
Hey Mori! There seems to be a gremlin in the software. Something keeps changing the shape of both leaves once I save the SVG, but I think I found a workaround to keep it from lengthening. I added the updated files to the download. Let me know if this version works.
Great – looks like that did the trick. Thanks!
Hello everyone, I have missed being a member of Lia’s amazing classes. I have been caring for my amazing husband Paul and he is now in a hospice with brain cancer. Flowers have have always been my therapy to cope with anxiety and depression.I intend to make your amazing flowers to donate to the Hospice to cheer everyone up !!!!!!
All my love
Teresa Centazzo
xxxxxxxx
Oh, my heart just burst open. You are AMAZING, Teresa. 🙂
I have tried to download the clematis for several days now and always get : “Windows cannot complete the extraction. The destination file could not be reached. ” I have not had any problems ever opening other files. Have any ideas? Thank you for all you and your team do. I love hanging out with you all!
Hey there. Try it again. I just re-did it and it seems to work for me.
Good news! I did it! I asked AI who said to rename the zip file to a shorter name and then right click–it worked! Not sure why I was the only one with this problem but I’m just so happy that I can get ready for the clematis!
Oh good! I am curious if the issue was on our end though.
Is it possibel to get the supply lists for the last 3 flowers so we can prep prior to class?
Hey Kelly! There is a full list of supplies for all the flowers. I do not post the month ahead because I am still designing and filming these flowers, and something might change. It is better, as I have learned, to have it right the first time it is posted, so there is no confusion. If you have everything on the list, you should be good to go. 🙂
Where can I find the supply lists for the next 3 flowers? There is no link below the photos. Thank you in advance I know it’s just me not looking in the right place.
They are in the posts. Let me update those links.
😊
Hi Lia! For the Clematis DIY double sided is it extra-fine lilac for both sides?
Correct. You can also make it from one layer of extra-fine if you prefer. I will show the difference in the pre-live of the workshop.
Your new book is GREAT! Since joining you I can’t stop making flowers! My husband of 63 years loves my new interest and asked me to make his favorite flower (hollyhock) for his 85th birthday which I did. Thank you for my new joy! (I’m 83).
Karen
Thank you for the message, Karen. We are so happy you are here with us. And helping us spread the joy. 🙂
Hi, I see on the supplies list for the clematis, the pan pastel 520.7 Ultramarine Blue light is used. I have 520.8 Ultramarine Blue tint and 520.5 Ultramarine Blue -would either of these work?
Thanks!
These flowers have such a variety of purple colors, so I would say yes! Test some on a scrap and see what you like best.
Really enjoyed the intricate steps involved in making my first hydrangea. I’ve prepared enough petals/leaves to make two more clusters and would like to vary the size as you suggested in the video. Any suggestions about how to bundle the florets into smaller clusters?
I find the division between the darker juniper main stem wrap and the lighter stem wrap visually abrupt. I’m considering using a brush marker to soften this edge but am concerned about making matters worse. Suggestions?
I was debating which side to place up for the leaves. I picked a hydrangea leaf from the park (don’t tell) to decide. It is amazing how, once the pan pastel and Mod Podge have been added, how close in colour one side (the “greener”, not “yellower” one) is! Amazing. Another winner – thank you.
Can’t wait, however, as others have mentioned, for a bit of a change with fewer and bigger petals for our next challenge.
Hi Joyce! For the transition to the darker color of the stem, my leaves are on that transition, so it is less visible, but it would work well to use the bright yellow-green PanPastel to blend the two colors. You could also use a brush marker, but I would start with a lighter marker first and blend in a darker second marker at the base. For the smaller clusters, you can make 30 florets, cluster into sets of 3, then cluster 9 of those into bundles of 3 with the single tucked into the center.
Thank you so much. I tried the pan pastel as a transition on the stem and am very pleased with the results.
Looking forward to making a companion smaller cluster per your suggestion.
I’ve en joyed making the forsythia and the lilac and the hydrangea, which is one of my favorite flowers but, I’ll admit I’m looking forward to the clematis next month with not as many little tiny flowers to assemble the big petals are a welcome change.
This made me laugh. You are so right. We are also making the gorgeous tulip later in the month. Six petals! 🙂
How many of each flower type do we need to make for the final arrangement?
I will show an arrangement with one of each and 3 of each.
Can I add to the plea about seeing the new colours again soon, my video was a bit stop and start last night (I have had PC issues lately!) And would love a better close up look at what’s coming. Thanks Lia xxx
Maybe we will make a little video to share with everyone in the Crafters portal.
I found the new colour charts with the name changes. I would like to know which colours you will no longer be using. Are you planning on making flowers to use them up before they are gone? I am sure there are many of us who have a lot of theses colors and it would be nice to have some idea of how we can use them
We are not discontinuing any colors at this time. We will still use them up for sure. No paper will be wasted.
I am confused as to what colour fern is. In some places it seems that it is the same as green tea and in others it i much darker as the double sided fern and moss.
I often get confused with colours as the name changes. Is there a chat somewhere that says what different names old colours are now called. I have your initial book with the colours but I don’t think it is up to date.
It is confusing. Apologies. Initially, we called it green tea (for the long sleeves), then, for some reason, it was changed to Fern. I say this with a wink because I am the one who changed it. We were laughing today about the crepe’s name from 8 years ago and how we wish we had a do-over.
Hello Lia,
Is the svg template available to precut the Clematis or do we need to wait until the 10th?
They will be available on July 1 with the collection release. Exciting!
I cannot wait!!! You’re right, EXCITING!
I’m hoping that I might be able to catch the replay of where they show the new crepe paper colors coming soon I’m at work I know I can see the master class video but not live.
Yes, there might be another sharing of the new colors coming up. Stay tuned!
Good morning! I haven’t been crafting lately and decided to jump in and see what was new. I ordered the new book and LOVE IT! I got started on the masterclass yesterday and so I’m a little behind but so looking forward to getting started. I did have a question about the cosmos template. Do we need to stretch the bud center before cutting it or cut it without stretching? I did print the templates yesterday, so I believe I have the most updated versions. Thank you, Lia and Team for everything you do to put these classes together for us. I LOVE making crepe paper flowers.
Welcome back, Danita! We have a lot of new things going on. 🙂 Do not worry about being “behind,” as we designed this course to let you move at your own pace, with a full week for each flower.
For the cosmos, you will want to pre-stretch all of the petals and bud centers before cutting.
The Cosmos template says to “pre-stretch BEFORE cutting”. However, in the video you are stretching after cutting. It seems like you have more crepe paper because you didn’t stretch before cutting. Do we stretch before or after cutting?
For the petals, you do need to pre-stretch, for sure. For the stamen, you can cut first. Looking at the PDF template, I see that the message for the petals to pre-stretch is also above the stamen and that could be a bit confusing.
Because it says, “Pre-stretch the heavy crepe paper”, that makes me think you need to pre-stretch all the heavy crepe paper on this template. Thanks for clarifying.
Thanks for pointing that out. I will update this template to have better clarity.
Step 12 says, “zigzag pinking shears”, but it looks like the scallop ones were used and zigzag weren’t used at all in this design. Can you please confirm which shears are used?
You are right! I will get that fixed. Luckily, it says scallop everywhere else. 🙂
I need major advice about the Hydrangea petals, I tried to cut by hand, I unfortunately don’t have a cut machine 🙁 any advice?
Also, love the book! Bravo
Hey there! Since this is extra-fine crepe paper, you can stack at least 6 layers (with small, sharp detail scissors), use mini clips to hold the layers together, and cut by hand. I encourage you not to try to be perfect with each petal, since there is so much variety with the real flowers. Then, once you get going, play an audiobook or music that puts you in a flow and go for it. Before you know it, you will have a pile of petals. Now you just inspired me to do a quick video for our Instagram, showing how to do this. Stay tuned!
You’re the best, thank you
I’m not sure you got my last message. So I am repeating it again my husband always prints my templates. I am not computer savvy. But I love making flowers. We have been trying to print out the templates for this master class. He says that he cannot print them out because he doesn’t have the program to open and download the templates. What suggestion do you have for us?
Hello Signe, You will want to print the PDF templates, not the SVG version as those are for the cutting machine software. For the PDF, you can open it in a free version of Adobe Acrobat. Be sure when you select print that it is set for full-size or 100% rather than “fit page” so the templates do not shrink. Let me know how this works for you. 🙂
My forsythia template only has 1 yellow flower petal on it but in the video yours has 2. I’m assuming the 2nd one would be for the buds but there aren’t any bud petals on my template or SVG file. I downloaded the template and SVG again just in case they were updated but there still isn’t bud petals.
I will double-check the templates again, but you are correct. The flowers have two sets of petals, and the bud is one. They are the same shapes.
Hi, I have a question about the sepals. On the template it has the larger sepal for the flower and the smaller for the bud but in the video I thought I heard you say it was reverse. Which is correct?
Thanks!
I did mark them incorrectly (which I will update), however, they will both work, either way. 🙂
Loonster- I also had this problem. I cut Stamen A on the Cricut and then recut it using the template as it seemed much narrower (& shorter?) than Lia’s strips on the video–but no difference between the two. By the time I folded over the edge it left very little to fit in the fringe clip. Not sure where I went wrong. I ended up cutting 4 Stamen B strips instead, since they are wider, keeping one to go with Stamen C, which worked and ended up looking fine.
I just updated the SVG to make it larger. That might help.
P.S I’m loving this whole process.
I love hearing that! 🙂
Hi Lia and Team,
I am loving the class so far! Just finished the first flower, and going to start the Cosmos tomorrow. I am having trouble printing the round labels onto the Avery labels you recommended. Your template is designed with 3 across and 3 down, evenly spaced on the 8.5×11 page. The Avery template is 3 across and 4 down, so the middle row of your design ends up printing on the two middle rows of labels. Since the template is a PDF, I am not able to edit it. Any chance you can either open it up for editing, or resize your template so it prints on the top 3 rows and leaves the bottom row of labels blank? I don’t believe it is a printer setting, as it is printing out exactly as it appears on the template. I already opened the pack of labels and don’t think I can return them, and they were quite pricey so would like to make this work. If anyone has another suggestion, I’m open to trying 🙂 Thank you!
I am sooooo sorry, but I posted the wrong version. You are right, there are four rows, and I had that one designed after I picked a new label. I have updated to the correct version, which has the crepe paper type labels in the last row. Again, apologies.
Thank you so much .Yes I have to agree cosmos flowers are floating above the other flowers.I also love all the different varieties you can grow in the garden .
You are so welcome, Donna!
Where is the video workshop?
Hello Georgia, you can find each flower workshop in its individual module. For this first round, you will need to click complete for each lesson to move to the next. Let me know if you have any other questions. 🙂
The template instruction says to pre stretch the heavy crepe for the petals before cutting on the cricut. It also says to pre stretch the stamen pieces before cutting is that right?
Correct. I also show that in the video. 🙂
Love these flowers and look forward to making them in all the different colours. I ended up watching the part of the video about the stamens several times. In the video you definitely stretched the stamens after cuttings, not before.
I really like having a printed copy of the photo tutorials beside me as I watch the videos. I make notes about tiny details not necessarily covered in the photo tutorial.
I adore the naturally “crumpled” look that you get when cutting petals from the stretched heavy paper. I’m thinking of trying this for making poppies – could be interesting look!
Yes, this is a perfect method for the poppies. The extra-fine is too light. I loved the recent one Meagan designed using the double-sided, too.
During the video, I think your yellow stamens were a bit thicker than on the template… when folding the smaller one, I end up with a bit less than a centimetre available for cutting and the piece for gluing becomes tiny….is the height of the small stamen correct?
See if you like the updated template better.
Yessss 🙂
Thanks!
for the stamen your template looks different then what I down loaded. I have a longer skinner yellow stamen and a short wider one. It looks like both of yours are wider and only a slight difference in length
Go ahead and stretch the stamen strips, then use two each of the A and B, the width of your fringe clip, and one of the C, the width of your fringe clip. And since each flower can vary, you can make the centers smaller if you prefer.
They are very time consuming but very pretty. I always make more than just one. I usually copy the pattern 5-10 times so I have everything I need to make a nice arrangement.
Love that! Efficient!
I noticed that you have many of your heavy crepe papers on sale. Will you be discontinuing heavy crepe paper?
No, we are not discontinuing; we just do not use it as much and have a large amount in the shop. We are also in the middle of a repackaging design.
Looking forward to making the hydrangea
Yes! It is a fun one. And stunning.
Great series as usual! Thank you! Did you stretch the pollen first?
If we are referring to the forsythia, I did because I cut it the wrong direction against the grain. The template shows to cut along the grain line which is not stretchable. But… both ways work just fine. 😉
Thank you. Yes, forsythia. I didn’t read closely enough. Much easier when I followed the correct directions!
Haha! Something I have to remind myself about daily. 🙂
Finally finished my Forsythia branch. It was a tough one, and I am so glad I learned how to make its trumpet flower. I got good at it about flower #20. Can’t wait for the beautiful Cosmos.
Wonderful! And now these tiny flower bits are less intimidating for the next branch you make. 🙂
Wow! I have been a member for several years and I have to say I have enjoyed all of the classes we had to take. Can’t wait to get started.
Love having you here in our little community, Signe.
Hi Lia,
How long should the finished branch be approximately?
Mine are all different, but somewhere between 15 and 18 inches.
Hi there! The Apricot Lemonade Cosmos material list has Heavy Aubergine crepe paper listed, but the pdf template says to use Heavy Plum for the cosmos stamen. Which should I use to cut out the purple stamen so I can match the gorgeous flowers you have pictured?
Oh! That is right, I changed it at the last minute to keep the crepe colors to a manageable list for those who were purchasing. I will fix it on the template. I used Aubergine in the upcoming workshop, but either will look lovely.
Hi Lia,
Another great Masterclass! I’m having a problem with the labels-wondering if you used the Avery Template for the labels that were recommended-as it’s not lining up for me. If the labels were made editable could we input them into the Avery Template? I realize that printers can be different, but this was off quite a bit. I tried the using the print then cut option too, just to see if that would work-sadly it did not. Thank you so much.
I am going to check the print-then-cut version on Monday, but for the printed version, did you ask your printer to use full size, 100%, or did it “fit page”? Some printers do that, which is slightly annoying. That makes a huge difference. If you printed it 100, then I can go back and review the file. I did use this one to print my labels.
I’m having a problem with the print then cut too. It opens a the sticker page instead of downloading to an svg. Hope you are having a nice weekend.
For the print then cut you need to use the JPG file not the SVG. We have instructions on how to do this. https://liagriffith.com/craft-academy/a-crafters-guide-to-the-cricut-maker/lessons/4-print-then-cut-labels-gift-tags/
Hi Lia,
Thank you for the quick reply. Tried the Print-then-cut file again today (6/9) on both HP and Canon printers-thought my feed may have been off on the Canon-printed both at 100%. Sadly I had the same results using both printers – I’m using the Avery 5294 labels. Not that I NEED the labels but I do like the coordinated look. It looks as though it may be a me issue though…hmmm 😉 Thank you again for your help.
That is so strange. I used their template for these. I just tested my file again, and it worked for me. What a puzzle.
One question: are you printing directly from your computer or through the Cricut? I am only asking because Meagan was a bit confused about that step this morning.
That is odd. I wonder if we are using the same Avery labels? When I open the file listed as Flower Labels-the spacing doesn’t match the Avery 5294 labels. When I open the “print-then-cut” file it appears that the spacing would be closer to the Avery labels, but doesn’t match up upon printing. I’m printing directly from my computer-didn’t import it to Cricut, as I’m using the round labels, so I didn’t plan on cutting them.
Molly, I am so sorry. I think I need to take a time-out. No, wait, I just did (my trip to Italy), so maybe I can use that as an excuse for all the silly mistakes I’ve been making lately. I had a second (correct) version, and mistakenly uploaded the first. The download should be correct now. There are four rows of labels, 12 total, instead of 9 labels on the design.
Thank you-I now have my beautiful labels-you created! I’m in full support of you having another vacation-you have been doing a lot for this wonderful community. The Apricot Lemonade Cosmos 😍they may be my favorite flower yet! I was not familiar with them before this-will be adding them to my garden next year. Thanks again, enjoy the day
You just made my day brighter. 🙂
Hi – enjoying the project so far! Just checking – for one branch you said 20 flowers and 10 buds, so in total we need 50 petals, correct? The .svg only has 40 petal, enough for the 20 flowers. Not a big deal on my end to cut out 10 more but wanted to let you know if you wanted other update the .svg & .pdf?
You are correct, and the file will get the update shortly. 🙂
The file for the flower labels does not offer a download or a print option when I click on “download.”
The flower labels will open in a separate browser window, and you can download them from there. If you are still having issues, I can zip them and they will go straight to the download folder on your computer. Let me know if you need that option.
What size paper would you open the svg file on for silhouette?
Would you consider adding a small square in the cut file (or specify the expected size of the page) to ensure the svg is opened to the correct size? Kind of like a digital sewing pattern. Since I’m using the silhouette and not cricut to cut, it would be really helpful to have that to ensure it’s cutting the right size.
Hi Esther! Are you referring to the flower templates? We do have really good luck with Silhouette placing the files at the correct size and not changing the dimensions. We have added sizing in the past, but felt it was no longer necessary; we can change our minds on that. 😉
Yes, the flower templates! I would really appreciate the ability to do a sizing/scale check. Measure twice, cut once, right? 😉
Kelly, just added a response as well. She is our Silhouette expert. I will talk about this with Meagan too. 🙂
Esther, I’ve never had Silhouette open a Lia Griffith SVG in Silhouette Studio at the wrong size, and I do it all the time. You can also compare it to the PDF, which I always print out anyways. If you’re on a PC, you can just drag and drop the unzipped SVG file from the folder onto any page size in Silhouette Studio and it will not resize the file. I hope that helps!
When you have a moment, could you please adjust the svg file to orient the yellow stamen piece to cut across the grain? At the moment it is aligned vertically. I could, of course, cut this piece manually, but it would be handy to be able to cut it out with the petals. Very good video today – thanks again for your amazing work.
Joyce. My apologies. I realized this morning, while watching the live video, that I completely made the mistake of cutting my pollen in the wrong direction. I am having my video editor add that note to remove any additional confusion. That will be updated in the video later today. The intended direction of the pollen piece is correct on both of the templates. I am soooo embarrassed about making such a silly mistake today. Though truthfully, it will work both ways. 🙂
Do I have to join vimeo to take class? How much does it cost>?
No, you do not need to join Vimeo. We will have the live and replay streams right here on the site. This master class is part of your Craft Circle membership. 🙂
Hi Lia,
One more question on the flower label “print then cut” for stickers. I was able to get my “print then cut” download for the flower labels to download, but when I put it on the mat to cut it after it printed, it only cut out an outside rectangle. Is there something that I am missing? Has anyone else had this issue? Or is there a work-around I can do to get them to cut out as a “print then cut” on my Cricut so the circles will cut out? Also, in Cricut, I had to make the size smaller in order to use the “print then cut” function.
As I am downloading the first 3 flowers to cut on my Cricut everything is working beautifully.
What do you suggest?
Cricut has a unique way for print then cut. You can find our tutorial here in this workshop. (We are working on a new video for this, too.) https://liagriffith.com/craft-academy/a-crafters-guide-to-the-cricut-maker/lessons/4-print-then-cut-labels-gift-tags/
Thank you for the link. I did watch it, and actually I am very familiar with Cricut “print then cut”. I was hoping there was something that I was missing, but I did exactly what you showed in your tutorial. So now I am still wondering how to get it to cut the circles.
Were you able to delete the white background outside of the circles?
Hi! Will the master class bundle be available i. The store any time soon? They are sold out.
We will have the white wire back in the shop next week, completing the bundle, and resetting it to “in stock”.
Hi Lia, (again!)
I forgot to ask you about the 2 green Pan Pastel colors that you are currently out of. Is there another color you carry in stock that you would recommend getting instead.
We will have the Bright Yellow Green next week and you can use the permanent green shade as an alternative for the blue green: https://feltpaperscissors.com/product/panpastel-artist-pastel-permanent-green-shade-640-3/
Thank you!
Hi Lia,
I am getting ready to place an order and I have plenty of 6mm and 12mm spun balls but no 18mm spun balls. I have 15mm and 20 mm spun balls. Will either of these work for the 18mm spun balls you are using?
You can use either of those for sure. I am LOVING the new sample pack that Spunnys created for us, since it gives you a handful of each size for occasions like this. 🙂
Thank You Lia,
I would order that pack, but I have a ton of all the others including a lot of the egg shapes too!
Will you be talking about how to modify the size of the spun ball in your tutorial to make the smaller ball work, as in to getting it the correct size?
These lessons are pre-filmed, so I will not be able to do that in the lessons, but will add that to my tips list for a quick video.
Hi! I loved reviewing all the Foundational Techniques in the intro class and eager for tomorrow’s class. After finishing each section, I marked each as complete, but I’m still seeing a lock by the supply list and templates. My message at the end of the Foundational Class noted I have completed everything. What am I doing wrong? I’m sure I have overlooked something simple. Thank you!!
Danita 🙂
Hello Danita! When you are on the master class main page, do you see a button in the top-right banner labeled “save your seat”? (Today I am going to change it to “Join the Class”, so depending on when you read this, it might have changed. If you see either of those, click that, and it will bring you into the course. Let me know if this works for you. If not, we can troubleshoot more.
I keep checking back for the Master Class Forsythia templates and can’t find them, even though I completed and received a Bloom from the Foundation Class!
The Master Class modules are still locked on my screen. How is everyone else opening the PDF and SVG templates?
Hello Ann. I added a note at the top of the master class page this morning. It tells you how to unlock those modules. Let me know if this helps. 🙂
Found them on my laptop just now, thank you so much!
Wonderful!!
Since the shop is out of Blue Green Pan Pastel, would Permanent Green Shade 640.3 be a good substitute?
Yes! We ordered extra for the master class, and they flew out the door.
Hello – Is the heavy nectarine paper supposed to be stretched before cutting on Cricut?
For the forsythia, I did not pre-stretch the crepe.
Hi, this looks amazing.
Would it be possibleto also include the flower labels as round stickers that could be cut out with a cutting machine and Print and Cut? Thanks.
Done! I just added them for you. 🙂
Hi Lia,
The labels don’t download into an svg file. Maybe it’s my mac but your other svg files download great. Help:)
Darlene
The labels are put together as a simple printable PDF or a Print Then Cut which you will need up upload it as a JPG. Here is a link that shows you how to use the JPG for a Print Then Cut: https://liagriffith.com/craft-academy/a-crafters-guide-to-the-cricut-maker/lessons/4-print-then-cut-labels-gift-tags/
thank you!!
Love this message Lia and love the new structure! So good to see you so relaxed, happy and full of verve! Really looking forward to this Masterclass x
So happy you are here with us, Diana!
Hi there, just finished watching foundation course, re-watching the bits that always throw me (cutting on the Cricut! mostly opt for hand cutting as I am a coward!) printing everything out, now double checking supplies and telling the family I love them and will check in with them now and again when I am not making flowers!
I have been with you now for quite a few years and have joined in the Masterclasses before, but this one feels different, much more like actually being in a learning environment. Sadly I can’t be with you on Friday 5th, but will catch up over the weekend. Looking forward to it, thanks for everything you do.
Hello Carol! We are delighted you are here. Yes, I did break this one down a bit differently. I love hearing your feedback about this version of the class. 🙂
Hi, on the cosmos template, the “cosmos bud petal” shows on a coral color, but the description is extra fine cypress color. Which one is correct?
I will hop in and fix that. It should be the coral. That is what I get for a copy and paste. Haha.
😁 No problem. That shows these are hand made and not just a machine
Exactly! 🙂
Beware of automatic spell check as well, it can be a disaster if it fills in an inappropriate word. I’ve been embarrassed by that myself. LOL…
Lia, I just want to say thank you for the foundation class and this master class! So much valuable information in a neatly organized place. I’m just learning to use my Cricut, and that module was most helpful.
I love hearing that! Meagan is working on a foundation series for the Cricut that will go beyond crepe paper, so stay tuned.
Hi Lia & Team .. I’m just loading up the meadowlark Forsythia(infact same question applies for each of the flowers) on my Cricut and was wondering how many stems/copies I will need to cut of each for the final arrangement at the end of August … will it be one of each stem or 3/5 as a rule ?(sorry if this is a silly question as I think Sara below has just asked the same thing.. which module 2 am I looking for if uploaded on here ? ) btw so looking forward to making all these gorgeous flowers … love all you do and amazing flowers & plants .. Thank you xx
Hello Liz! In the short intro video in the third module, I talk about this. I just renamed it “A Message from Lia” so everyone will not miss it. 🙂
Make at least 1, or you can make 3 of each.
Ahh thank you 🙂 thought I’d heard it while watching the videos .. but wasn’t sure .. I think for the forsythia looking at the template I may cut this by hand as I haven’t tried the heavy crepe on my cricut yet ( we shall see how it goes tomorrow)and the template looks easier to cut by hand tbh .. shouldn’t take too long to do 3 branch worths … hopefully !! haha xx
Especially when you can stack your crepe and cut more than one at a time. 🙂
So excited to make this gorgeous arrangement I am curios the number of flowers of each should we make. I’d like to cut enough in one go!
Oooh! I just added a video to module 2 where I talk about it. 🙂
Thank you!!
I’m wild about these beautiful flowers, especially the Apricot Lemonade Cosmos and the Clematis Blue Light. I have dozens of LG spun paper balls in every size except 12mm and 18mm. Could I wrap the 10mm and 15mm in extra crepe layers to approximate the sizes we’ll need for class? Also, is the La Belle Ranunculus in the Master Class the same as the Orange Ranunculus in the book? The materials list there specifies 20mm spun balls, but this Class Materials List does not include 20mm. Apologies for bringing up minutia when you’re rolling out a wonderful new class!
Yes, you can just add crepe to the spun balls to enlarge them. The La Belle Ranunculus is similar to the book and to the one we made for our in-person event last summer, but… I am changing it up just a bit. 🙂 Now that you say I am missing the 20mm, I am going to have to go back and double-check. Here is the “behind the scenes” transparency… I have not filmed that flower yet. 🙂
Loved the Foundation Class as a perfect review for the earlier Master Class and the 14 months (but who’s counting), that I’ve been following Lia & Meagan. Ready to step up to forsythia and that gorgeous bouquet!
Yay! We are so happy you are here. 🙂
Hi Lia. Where is the list of materials I will need to have ready by Friday? Not sure if I have the colors of crepe paper that we need.
The complete list is in module 1 of this class, titled “Getting Started”. The individual lists for the three flowers this month are in the links.
Any strong feelings on the pink rose Prismacolor pencil? I have PC 929 (pink) and I can get PC 1014 (deco pink) locally, but would have to order PC 1018 to match exactly from the supply list. Which flower is it for–parrot tulip? I suspect I can use my 929 because it looks just a bit darker but close to the swatch color. I think I have ALLLL the other supplies ready to go! ☺
Why are color names so confusing? Lol. The pencil I am using is called Pink Rose PC 929, yet on Blick, they just call it Pink, and there is another pencil called Pink Rose. I will update that now.
It is confusing because Prismacolor pencils are marked in two languages: English first and then French. On PC 929 the English word Pink is separated from its French translation, Rose, by a tiny symbol that somewhat resembles a triangle. PC 1018 is Pink Rose in English, and Rose Pale in French. I’m leaving out the little accent over the a in Pale. Hope this helps.
You are so right! That is why the numbers are helpful too. 🙂
Just gets better and better with this membership 😍
Awwww. Thank you for saying that. We do our best to deliver. 🙂
I totally agree
I’m so excited for the class! One question – should we get matte or gloss for the UV spray finish? I’m guessing matte but want to be sure before I order it. Thank you!
Love hearing that! I am excited as well. 🙂
We prefer matte for the spray, but honestly, the gloss looks the same to us.
Usually I can download the avg files to cut the projects on my cricut but there is no download button. Is there an extra charge for these projects? I’m a member.
Hi Sharon! This is all part of your annual membership. Check module two of the class for the first three template sets. 🙂
I can’t seem to find them. How do I access them?
Look over at the right column. There is a list of modules for this course. The first is “Getting Started: Supplies List,” and the second is the “Template Library”. You will need to click the “complete” button for each module to open the next one, so start with the first. Once you are in the template library, you will see the three sets of flower files. I will be adding to this every month. The Craft Academy is a bit different than the project posts, so it does take a minute to see how it works. Let me know if you able to find everything you need.
I feel so stupid. I see the list but each has a lock. I don’t see where the complete button is, sorry🥲
Have you gone through the foundations series yet? This is the prerequisite for this class. It is just short little videos that you might enjoy.
That was the ticket.i watched the foundation videos and then made it over to the master class and was able to access the templates. Thanks for getting me through😊😊
Perfect! I hope you enjoyed the Foundation series, too. 🙂
Where are the downloads for the cutting machine etc
The first three are in module 2. 🙂
I finished the foundation class will the templates be available before the video. I like to make everything along with the video.
Yes, the templates are now available. I am running a tad behind. 😉 They are in the module called Flower Template Library.
The flower template library only provides 3 templates.
Yes, we will be releasing three each month.
Only three of the flowers show individual supplies. What crepe papers and pastels, etc. are needed for the tulip and clematis?
That is correct. We will be releasing three flowers a month. This version is more of a slow crafting session. One week for each flower. 🙂
You have bind wire for the projects and in the picture of the bundle but not included in the bundle? Just thought you should know…
Oh thanks! Yes, it is meant to be in the bundle.
Is the Lady Fern in the master class different from the existing one on your website?
Yes, and from the new book. In the video, I will show how to cut by hand.
Hello! Do we need to have the book to participate in this?
Nope! 🙂 We will provide everything you need (templates, photo tutorials, and videos) in this course. 🙂
Thank you for the quick response!
I am very excited for this new Masterclass!!!! Where can I find the list of materials, so I can make sure I have everything? Thank you:)
We will be posting that list on Monday.
Thank you:)
I’m so looking forward to another masterclass – thank you all for brining the smiles into my creative time
You are so welcome! I am excited to start this series. 🙂