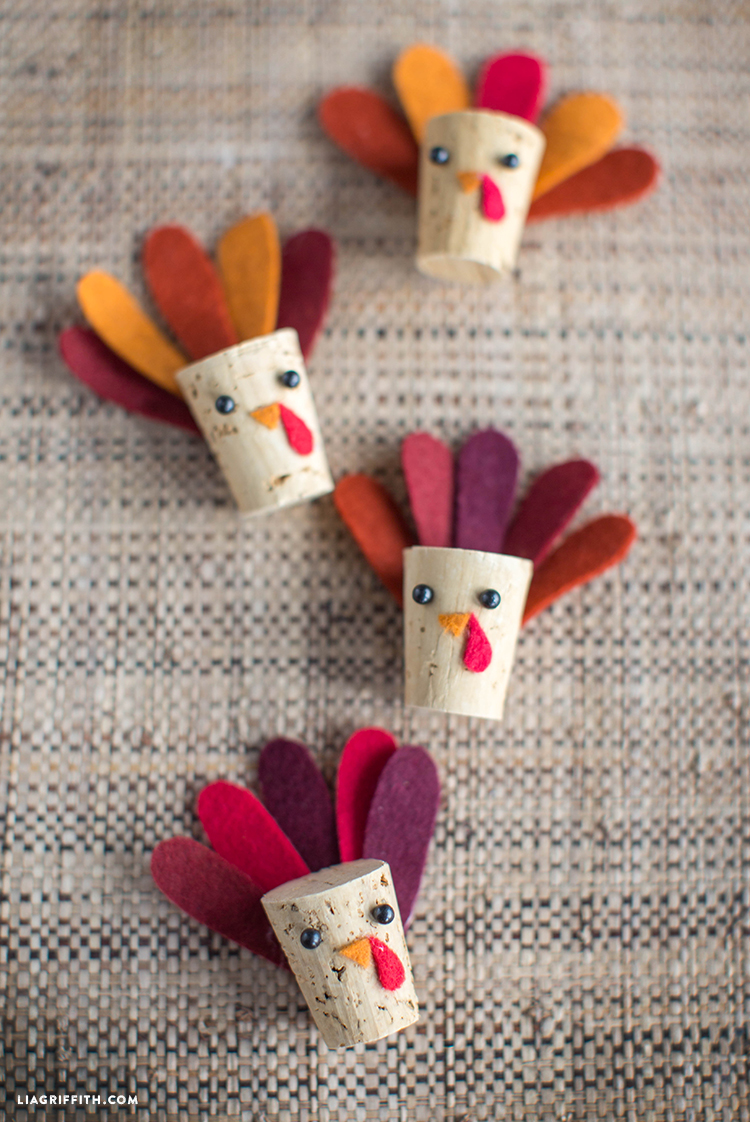
DIY Cork Turkey Kids Craft
Thanksgiving is a good time to take out your craft stash and get involved in some fun creative projects. Our DIY cork turkey is the ideal afternoon craft for grown-ups and little ones to make at this time of year. Fun and simple to make, this project had us giggling all afternoon in the studio – he’s just so goofy and cute! Why not have the materials laid out on a low table for the kiddos during your family Thanksgiving celebration? You can pre cut the felt pieces so they can select their own feather colors and add the tail, beak and snood with craft glue. Using black ball mini push pins the eyes are the finishing touch. We found all of our materials, the corks, felt, pins and glue at our local craft store. The pattern for the felt pieces can be downloaded using the button at the end of the post and includes three sized for small, medium and large corks. Enjoy! ~ Lia
Goodies You Can't Google
You've found a member-exclusive project. But for less than the price of a fancy coffee... You'll get instant access to this and over 2,000 other premium projects inside the Lia Griffith membership!
Become a Member
How to Make a Felt and Pine Cone Turkey
- Gather your craft materials. Then download our turkey pattern at the end of this post.
- Use the pattern to trim your felt pieces. There’s also a pre-colored version if your kids want to make this turkey out of paper instead.
- Use glue to put the face pieces together and then the tail feathers (follow the template notes).
- Glue the tail feathers onto the back of your pine cone.
Tools
Materials
- Corks
- Craft Eyes for Needle Felting
- Wool Blend Felt – Mango, Cranberry, Pumpkin, Bark Brown, Cherry
All the Goodies You Can't Google 🎁
Tired of scrolling endlessly for the perfect project? Save time, money, and Google-induced headaches with us! Our membership makes it easy to create beautifully finished crafts without needing to look all over the internet for ideas and materials or spend lots of money on individual videos and templates.
Become a Member


Discussion
Ask Lia or the community!
8 Comments
-

Jill Huett
October 26, 2018 at 11:27am
-

Lia
October 29, 2018 at 10:42am
@Jill Huett
-

Jill Huett
October 31, 2018 at 4:32pm
@Lia
-

Lia
November 1, 2018 at 11:06am
@Jill Huett
-

Cynthia Jenkins
October 26, 2015 at 3:48pm
-

Lia
October 30, 2015 at 7:47am
@Cynthia Jenkins
Back to the TopCan you please update and provide svg files for children’s crafts. Finger turkey puppet and cork owl and turkey crafts.
Thank you,
Jill
Hi Jill! We’re updating our older projects with SVG files as requests come in and time permits, we’ll make sure to get this one added to our list!
Thank you for your patience with us during the transition with SVG’s. Please let us know if you have questions and we would be happy to help!
Thank you, greatly appreciated! It would be so helpful and love cutting felt with the Cricut Maker!!!
The SVG is there now 🙂
I’m in love with all your new felt projects!!! Can you tell me what kind of felt you use? Is it the individual sheets you are using or are you buying by the yard? If by the yard, what blend of felt are you using?
Thanks!
We usually purchase both by sheets and by the yard. Always either 100% wool or a wool blend. Happy crafting!