
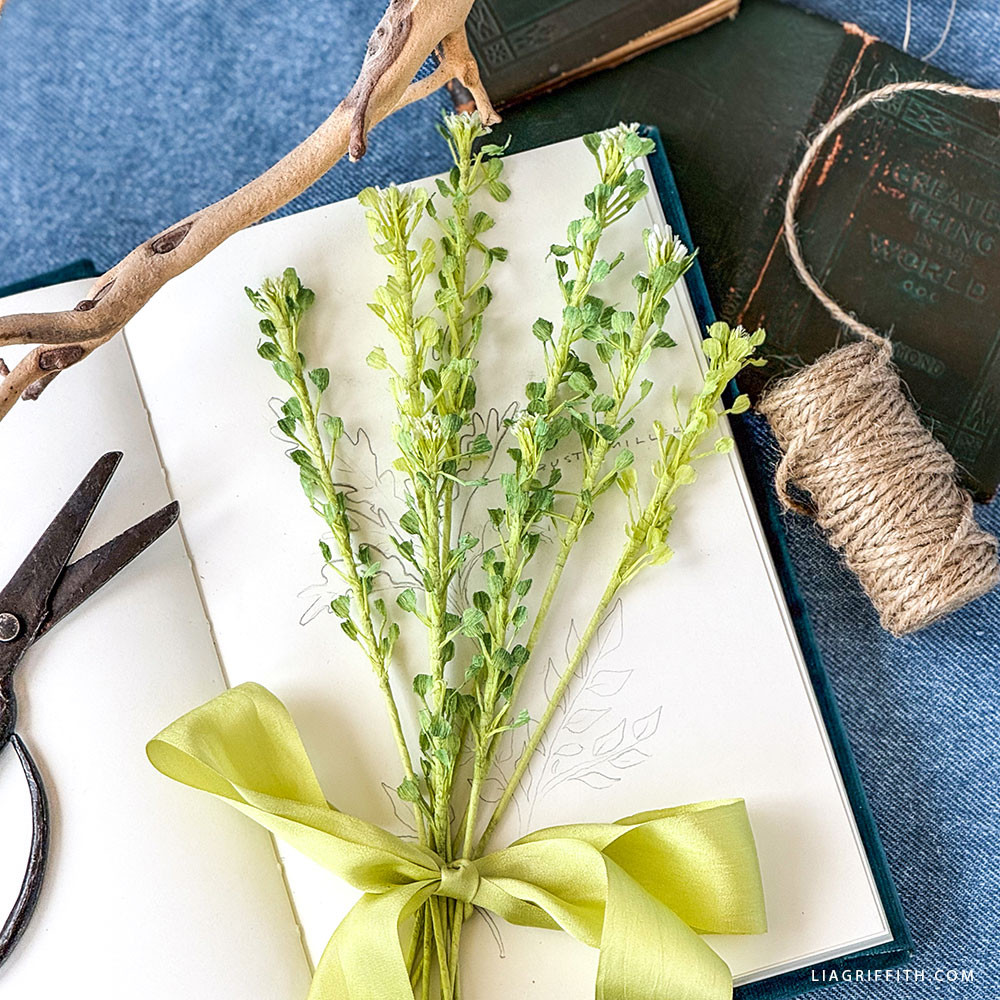
A Sprinkle of Peppergrass
We love introducing you all to plants and flowers that may be new to you, like this Crepe Paper Beautyberry Branch and our Crepe Paper Bells of Ireland. This month, we want to add a dash of wild, natural beauty to your paper flower collection with our Crepe Paper Peppergrass. These long, graceful stems with the funny name bring exciting texture and a unique look to any bouquet or centerpiece.
Project Includes
Tutorial and TemplatesTools
Materials
- Lia Griffith Extra-Fine Crepe Paper – Fern and Linen
- Floral Wire – 18-Gauge Paper Covered Green
- PanPastel - Permanent Green Shade 640.3
Goodies You Can't Google
You've found a premium project. But for less than the price of a fancy coffee... You'll get instant access to this and over 2,000 other premium projects inside the Lia Griffith membership!
Become a Member

This Crepe Paper Peppergrass is an intermediate-level project and a wonderful way to grow your crepe paper flower skills. Using your cutting machine will make this project go much more smoothly, but you’re always welcome to cut your pieces by hand with a good pair of detail scissors. Once you’ve gathered all your tools and materials, you’ll be ready to get started and let the magic begin.
Peppergrass is a wonderful, often underrated greenery that’s perfect for filling out bouquets while adding a touch of wild, rustic charm. Florists love it for its airy, feathery shape and clusters of dainty little blooms. It fits perfectly between bolder flowers, adding height, movement, and a natural flow to any arrangement. With this project, you’ll recreate that same light, organic feel with crepe paper that holds its shape beautifully and stays fresh and vibrant season after season.
Once you’ve finished crafting your Crepe Paper Peppergrass, tuck a few sprigs between crepe paper peonies, roses, or ranunculus — or display them in a simple vase for a sweet burst of green on your desk or windowsill. For something extra romantic, gather up your stems and tie them with a pretty silk ribbon or a piece of twine for that final “ooh and ahh.”
We'd love to see all the pretty ways you’ve chosen to style your Crepe Paper Peppergrass. So, snap your best picture and share it in our crafters’ community or post it on Instagram with #MadeWithLia!


All the Goodies You Can't Google 🎁
Tired of scrolling endlessly for the perfect project? Save time, money, and Google-induced headaches with us! Our membership makes it easy to create beautifully finished crafts without needing to look all over the internet for ideas and materials or spend lots of money on individual videos and templates.
Become a Member
Discussion
Ask Lia or the community!
6 Comments
-

Nancy
December 26, 2025 at 11:36am
-

Lia
December 28, 2025 at 8:51am
@Nancy
-

Elizabeth
July 13, 2025 at 8:11am
-

Lia
July 14, 2025 at 9:42am
@Elizabeth
-

Elizabeth
July 13, 2025 at 8:05am
-

Lia
July 14, 2025 at 9:29am
@Elizabeth
Back to the TopI love these! They look great with my flowers. Nice filler too.
And not too difficult for a tiny crepe filler. 🙂
I’m a little confused with the beginning of the tutorial. Is step two correct?
Yes it is correct, the flower piece is the smaller white strip and the stem is the larger green strip. You need to fold the flower strip in half over the top edge of the stem strip and use your white glue to attach it. It is the same method we use to make a lot of our flower centers that have stamen tipped with pollen!
This is so beautiful! I’m really excited to add this to my collection, I love the texture it can bring to a bouquet!
Thank you! 🌸💝
It is a good one for arrangements! So delicate.