

Pink Peony Club
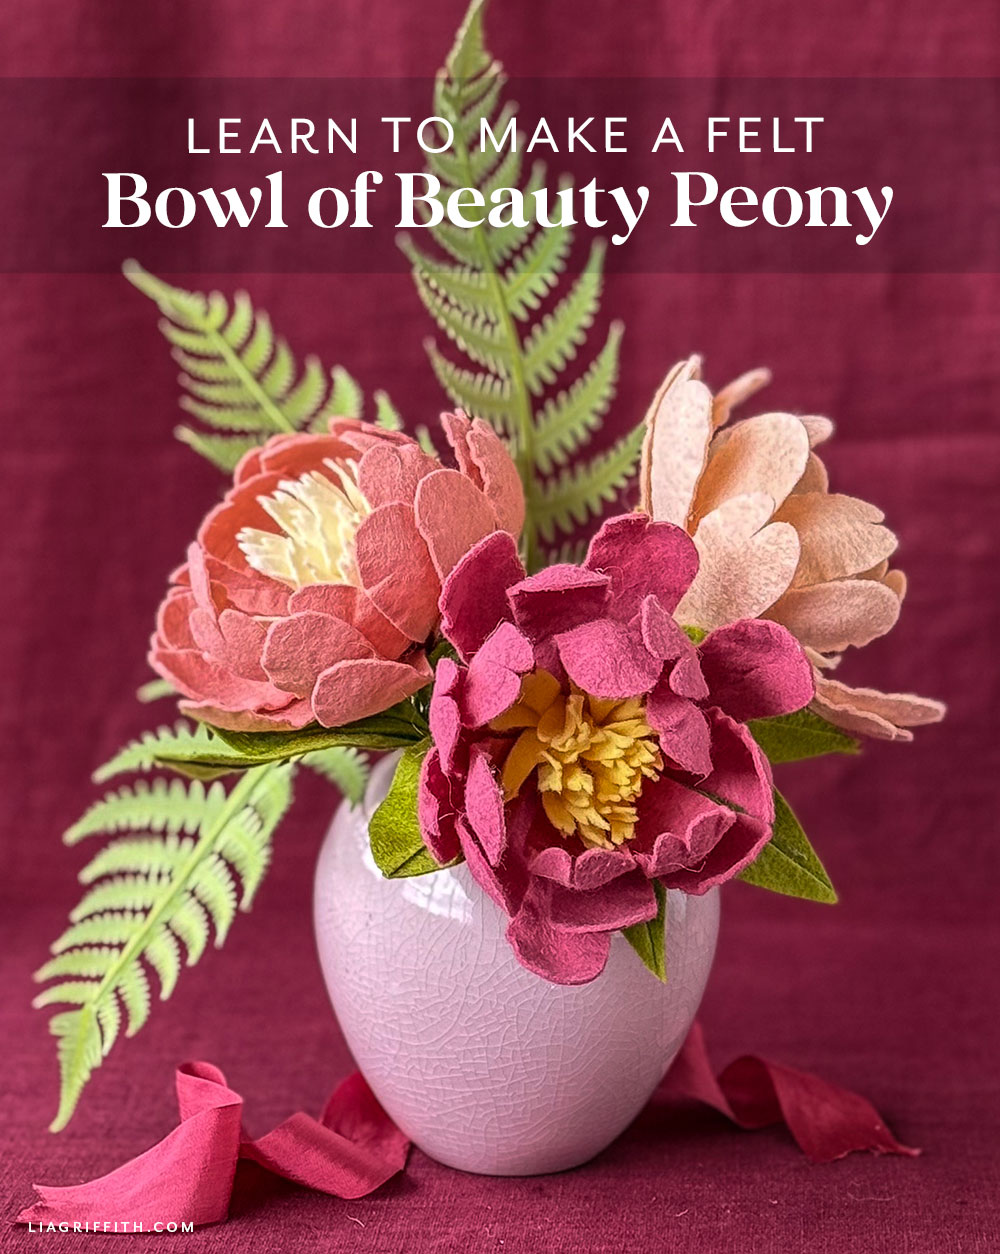
Few flowers carry as much presence as the peony. Graceful and mysterious, their layered blooms are impossible to ignore and long admired for their beauty and deep meaning. Our Felt Bowl of Beauty Peony is a fun twist on one of our favorite flowers (you’ll see it twice this month) and a worthy addition to your felt indoor garden.
Project Includes
Printable Template Cutting Machine Template Photo TutorialTools
Materials
- Wool Blend Felt—Vanilla, Buttercup, Light Peach, Rose Quartz, English Rose and Green Retreat
- Green Paper Covered Wire—18-gauge and 24-gauge
- Aleene’s Turbo Tacky Glue
- Aleene’s Stiffen Quick
Goodies You Can't Google
You've found a premium project. But for less than the price of a fancy coffee... You'll get instant access to this and over 2,000 other premium projects inside the Lia Griffith membership!
Become a Member
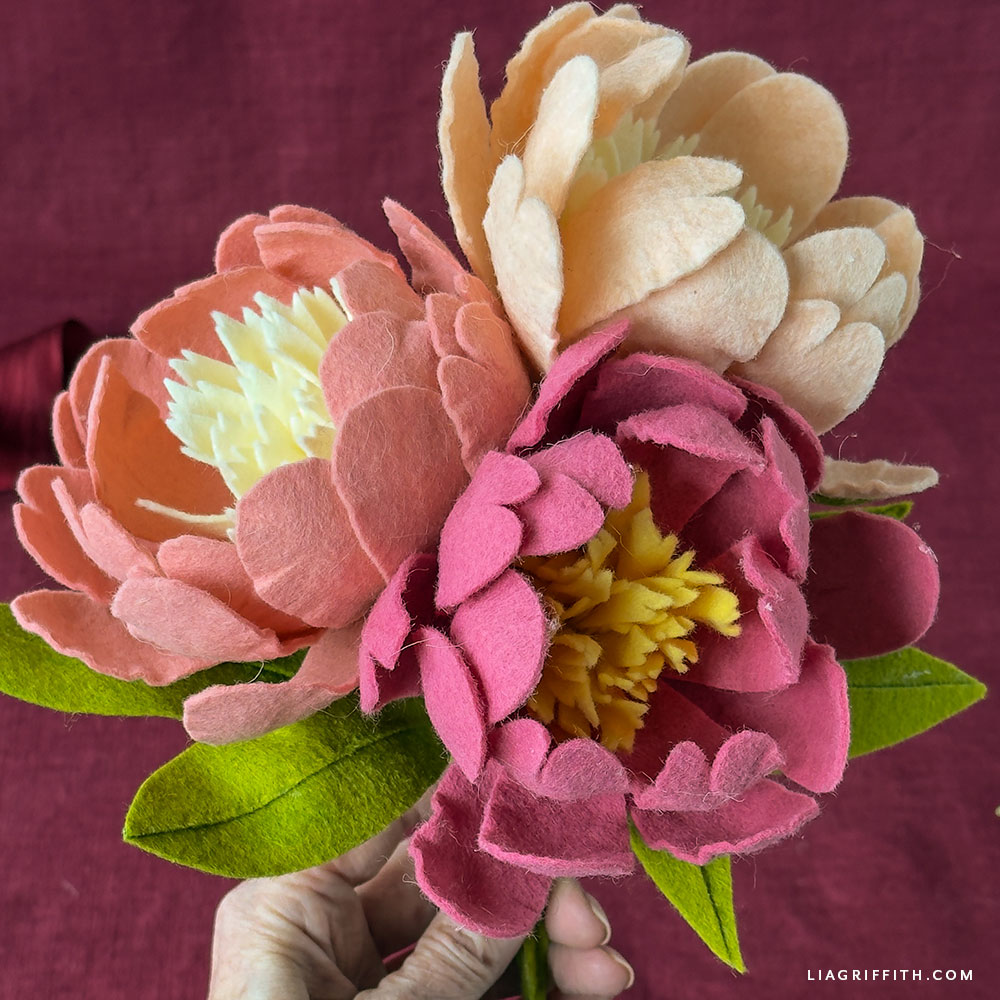
We consider these Felt Bowl of Beauty Peonies a beginner-level project. For our members still unlocking new skills and gaining confidence in their work, this craft focuses on building that signature peony fullness through simple layering. Because the shapes are forgiving and organic, you don’t need perfect execution to achieve beautiful results.
Once your pieces are cut, the process continues with shaping. First, you'll begin with the outer petals and then secure the base. After that, you'll add leaves to complete the stem. Because of its simplicity, this project is a perfect example of how little it takes to create beautiful, lasting pieces for your home. With just felt, floral wire, glue, and tape, you can create flowers lovely enough to rival any you might find in nature.
Peonies, known as the “king of flowers” in China, have deep roots and fascinating symbolism. Traditionally, they symbolize prosperity, honor, romance, and good fortune. They’re seen as a celebratory flower, there to honor life’s biggest moments. Over time, they’ve also come to represent compassion and a life well-lived, making them both meaningful and beautiful.
Peonies also come in a kaleidoscope of colors, ranging from soft white to a deep, moody magenta. For your Felt Bowl of Beauty Peonies, go with soft blush for a romantic feel, deeper tones for a little drama, or mix shades for added depth. However you style them, these big, bold blooms will no doubt bring a sense of richness and warmth to your arrangement.
When complete, display a single stem for a simple statement, or gather a few together for a fuller, more dramatic effect. And when your Felt Bowl of Beauty Peony is ready to show off, share it with us in the crafters’ community and on social using #MadeWithLia.

All the Goodies You Can't Google 🎁
Tired of scrolling endlessly for the perfect project? Save time, money, and Google-induced headaches with us! Our membership makes it easy to create beautifully finished crafts without needing to look all over the internet for ideas and materials or spend lots of money on individual videos and templates.
Become a Member
Discussion
Ask Lia or the community!
3 Comments
-

Lorena
June 12, 2018 at 10:00am
-

Pamela
October 2, 2017 at 11:52am
-

Lia
October 2, 2017 at 11:55am
@Pamela
Back to the TopComplimenti Lia sono uno spettacolo io non so inglese ma sono entusiasta..grazie di condividere i suoi progetti
Buona serata
Lorena
Would you please continue to include pdf templates for those of us who do not have the new Cricut Maker? I would love to make these felt peonies, but only a SVG file is the only option.
Many thanks. Pam
Oh yes, we will always include a PDF! We never want to exclude our amazing members that don’t have a cutting machine. This flower already exists as a PDF template, there’s a link in the post (https://liagriffith.com/felt-peony-flower/).